© 23e2 Business Services Inc. | Working With 3rd Parties

Menu
How To Embed A Google Virtual Tour On Facebook (Video)
Google Virtual Tour provides users with the opportunity to freely ‘walk’ around the inside the business with just their computers, mobile phones, or tablets. This is made possible with Google’s Street View technology, where several stunning panoramic shots are seamlessly joined together to create a 360-degree view of your business. It improves the trust and interest a customer will have. Therefore, it is in your best interest to place it on any business listing you may have. The issue is, outside of Google My Business, uploading it onto other sites is difficult. Here at 23e2 Digital Marketing, we understand this frustration, and have created this guide to help you upload a Google 360 Virtual Tour onto Facebook.
Please note: Due to new Facebook updates, only Facebook pages with 2,000 likes or more can create custom tabs to embed virtual tours.
Using Page Tabs
You can add custom Page tabs via Facebook. These custom Page tabs load content from your web server using an iframe. Page tabs will only be displayed in the web UI. Mobile custom tabs are not supported at this time.
“To ensure tabs lead to high-quality, accurate content, the Page Tabs feature is only available to Pages with 2000 or more followers, or pages managed by whitelisted apps.”
Read more at Facebook for Developers
5 steps to embed a Google 360 Virtual Tour to Facebook
Make sure you are logged in to your Facebook account which is associated with the page that you want to embed the virtual tour. Open Static HTML: iframe tabs.
1. Click on the button “use now” on app that shows up in the result section. You will be directed to the follow page. Make sure you are logged into the account that is associated with the page you want the Virtual Tour on.
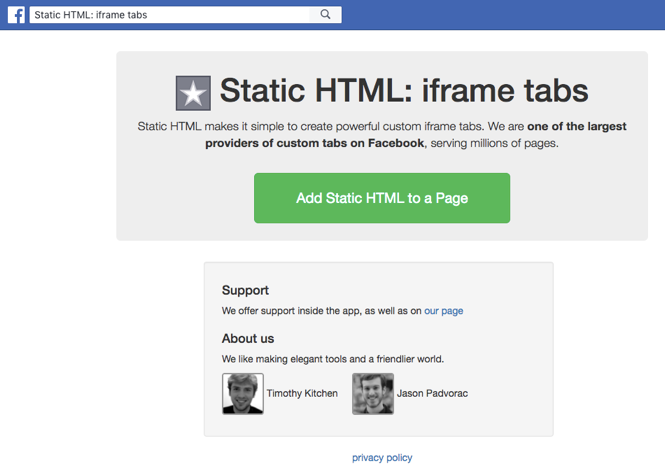
2. Click on the green button “Add Static HTML to a Page.”
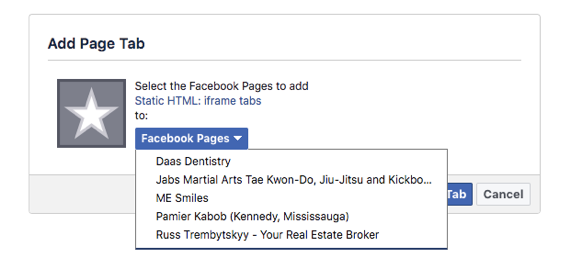
3. When you come to this page, select the page from the drop down menu where you would like the Virtual Tour to go to.
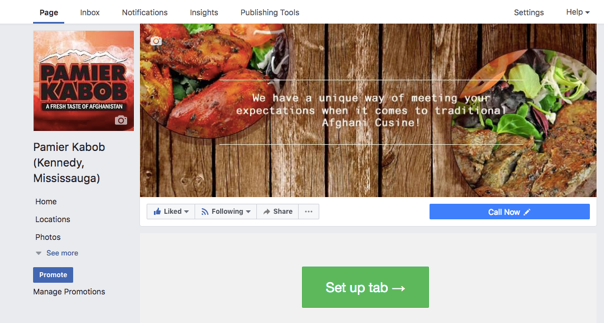
4. Continue to set up your custom tab by clicking on the green button.
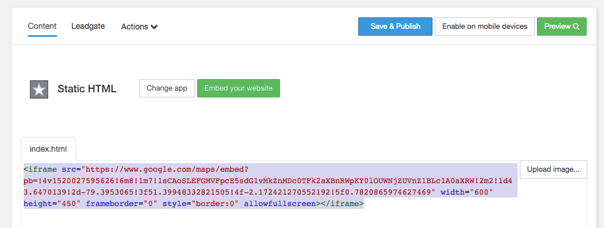
5. Insert your embedding code for the virtual tour in the space provided and click “Save and Publish”.
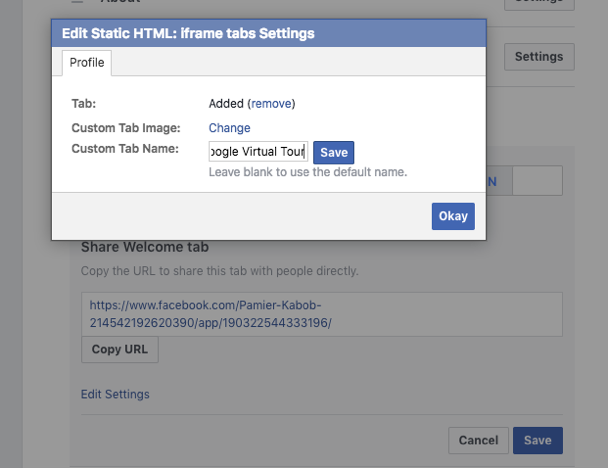
You can go back to your Facebook page now to view the tab and customize the tab name
As you can see the tab is by default named “Welcome”. You can now go to “Setting → Edit Page”, find the tab “welcome” and click on “Settings” beside the tab to edit the tab name.
Note: Don’t forget to press “Save”!
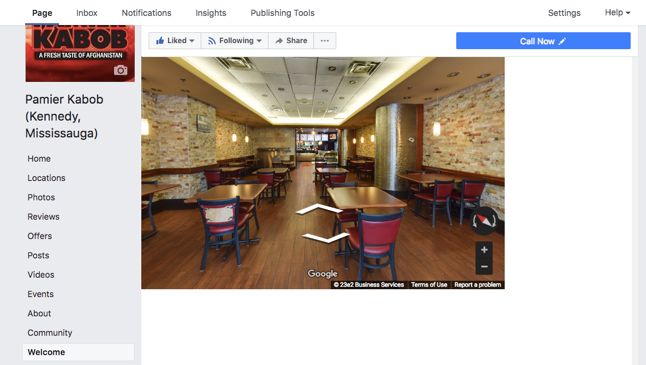
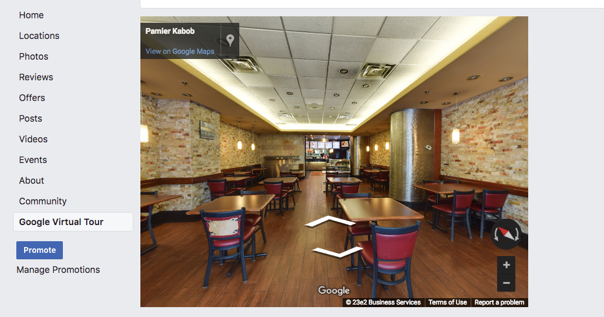
Now you can see the tab “Google Virtual Tour” on your Facebook Page!
How to get a Google 360 virtual tour?
Scheduling a photo shoot to enhance your Google listing is easy.
Contact us today to learn how to get a virtual tour of your business up on Google.
COMPANY
Menu

SERVICES
Menu
EXPERTISE
Menu
250 University Ave #213, Toronto, ON M5H 3E5
+1 (647) 576-2115
2220 Midland Ave #118,
Toronto, ON M1P 3E6
+1 (647) 349-2332
+1 (647) 349-2332
© 23e2 Business Services Inc. | Working With 3rd Parties